On this day in military history…
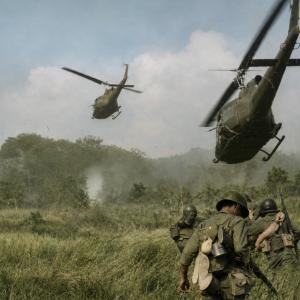
The evacuation of the last ANZAC troops from Gallipoli on 20 December 1915 was one of the most remarkable feats of deception, organisation, and seamanship of the First World War. After eight months of fighting, the Allied position at Anzac Cove had become untenable. Winter storms, mounting casualties, disease, and the failure of repeated offensives convinced the commanders that withdrawal was the only viable option. Yet evacuation was considered the most dangerous phase of the entire campaign. If the Ottoman forces realised what was happening, they could have launched a devastating attack on the beaches, potentially killing or capturing thousands. Instead, the operation succeeded with astonishing precision, resulting in almost no casualties.
Responsibility for the evacuation rested with Lieutenant-General Sir William Birdwood, commander of the ANZAC Corps, under the overall direction of General Sir Charles Monro, the new Commander-in-Chief of the Mediterranean Expeditionary Force. Birdwood’s Chief of Staff, Brigadier-General Brudenell White, was the key architect of the withdrawal plan. White approached the challenge with meticulous attention to secrecy and deception. He insisted that the withdrawal had to appear completely routine so that the Ottomans would detect no reduction in troop numbers until it was too late to intervene.
The evacuation was conducted in three gradual stages. The first two phases involved steadily thinning the lines by removing non-essential personnel, heavy equipment, and supplies under the cover of darkness. Soldiers remaining in the trenches were ordered to maintain normal levels of activity during the day, including rifle fire, patrols, and movement around the lines. Even meal times and camp routines were kept unchanged so as not to create suspicious silence or inactivity.
By the final night, 19–20 December, only about 10,000 men remained of the original tens of thousands who had occupied the Anzac sector. These troops were positioned in carefully planned defensive layers designed to hold off any Ottoman probe long enough for the last groups to reach the beach. To bolster the illusion of a fully manned front, ingenious self-firing rifles were set up. These used tins of water slowly dripping into heavier containers to pull a trigger once enough weight had built up. Long after the trenches had been abandoned, these automatic rifles continued firing, deceiving the Ottomans into believing the Anzac lines were still occupied.
Naval support was essential. The evacuation relied on a fleet of destroyers, trawlers, lighters, and transport ships organised by the Royal Navy under Admiral John de Robeck. Roughly fifty to sixty vessels of various types were involved over the whole evacuation period. Larger transports were kept well offshore to avoid detection, while smaller craft ferried soldiers from the beaches under cover of darkness. On the last night, destroyers—capable of approaching the shoreline quietly and rapidly—played the biggest role, moving in close to the beach to embark troops in final waves.
The final stage unfolded with remarkable smoothness. Shortly after 1.30 a.m., the last troops at North Beach and Anzac Cove began withdrawing down the gullies, keeping noise to a minimum and avoiding any visible light sources. Naval beach parties guided them aboard the waiting craft. At 4.10 a.m., the final men of the rearguard boarded a destroyer from North Beach. When dawn broke, the Ottomans were still unaware that the Anzac positions were empty. Not a single man was killed or captured during the final withdrawal; later, two soldiers were injured by accidental explosions set to destroy ammunition, but otherwise the operation achieved the near impossible.
Had the evacuation failed, the consequences could have been catastrophic. Thousands of troops would likely have been trapped on the narrow beaches with their backs to the sea. The Ottomans, possessing superior artillery positions on the surrounding heights, could have inflicted devastating casualties. Many soldiers might have been forced into surrender, providing the Ottoman Empire with a significant propaganda victory and potentially affecting morale across the Allied forces. A disastrous withdrawal could also have weakened British public support for the war and intensified political turmoil already stirred by the campaign’s failures.
One of the most remarkable aspects of the operation was the level of secrecy achieved. Very few officers knew the full plan. Even among the troops, many did not realise they were leaving Gallipoli until the final days, as most expected a renewed offensive in the spring. Another interesting detail is that the Ottomans later admitted they were convinced a winter offensive was being prepared because of the continued rifle fire and movement in the trenches, unaware that many of these sounds came from self-firing rifles and carefully staged routines.
The evacuation of 20 December 1915 remains a rare example of a military withdrawal executed with precision and without enemy interference. It stands in stark contrast to the costly and chaotic landings months earlier. What might have been the deadliest phase of the entire campaign instead became its most successful operation, ensuring the survival of thousands of Australian and New Zealand soldiers and securing a remarkable logistical triumph amid one of the First World War’s most difficult theatres.