On this day in military history…
On 8 August 1918 the German Army suffered a defeat on the Western Front that was far more damaging than the loss of ground, guns or thousands of prisoners. For Germany’s senior commanders, the Battle of Amiens exposed something far more serious: the fighting spirit and confidence of an army that had survived almost four years of war was beginning to break. General Erich Ludendorff, effectively the senior military commander of the German war effort, would describe the day in words that have become inseparable from the battle, calling 8 August 1918 “the black day of the German Army in the history of the war.”
Only a few months earlier the situation had looked very different. In the spring of 1918 Germany had launched a series of enormous offensives in an attempt to defeat Britain and France before the rapidly growing American Army could make its full weight felt. German stormtroopers had broken through Allied positions and advanced further across the Western Front than at almost any time since 1914. Yet the victories came at an enormous price. Germany lost many of its most experienced assault troops, supplies became increasingly difficult to move forward and exhausted infantry formations were repeatedly thrown back into battle.
By the beginning of August the initiative had passed to the Allies. British, Australian, Canadian and French commanders prepared a major attack east of Amiens under conditions of extraordinary secrecy. Unlike many earlier First World War offensives, there would be no prolonged artillery bombardment lasting days and warning the Germans exactly where the attack was coming. Guns were moved into position secretly, tanks were concealed and troop movements were carefully controlled. Canadian formations, whose appearance in a sector often indicated that an attack was being prepared, were moved with particular care in an effort to deceive German intelligence.
At 4.20 in the morning on 8 August, under darkness and thick mist, the Allied artillery suddenly opened fire. Almost simultaneously infantry and hundreds of tanks began moving towards the German positions. German troops who had received little warning suddenly found themselves confronted by a carefully coordinated combination of artillery, infantry, armour and aircraft.
The scale of the surprise was devastating. German artillery batteries were struck by highly accurate counter-battery fire and communications were disrupted. Tanks appeared out of the mist alongside advancing infantry while aircraft attacked positions and movement behind the front. German machine-gun crews who attempted to resist could sometimes find Allied troops and tanks appearing on their flanks before they fully understood what was happening.
This was not simply another mass infantry charge of the type that had characterised some earlier battles. By 1918 the British and Dominion armies had become highly experienced in combining different weapons. Artillery laid down moving barrages in front of the infantry, tanks attacked strongpoints and machine-gun nests, aircraft observed enemy movements and attacked targets while engineers, cavalry and supporting units moved forward behind the initial assault.
Australian and Canadian formations formed the spearhead of much of the attack. The Australians advanced around eleven kilometres in their sector while Canadian forces advanced almost thirteen kilometres in places. Across the battlefield German positions that had been expected to resist for considerably longer were overrun with remarkable speed.
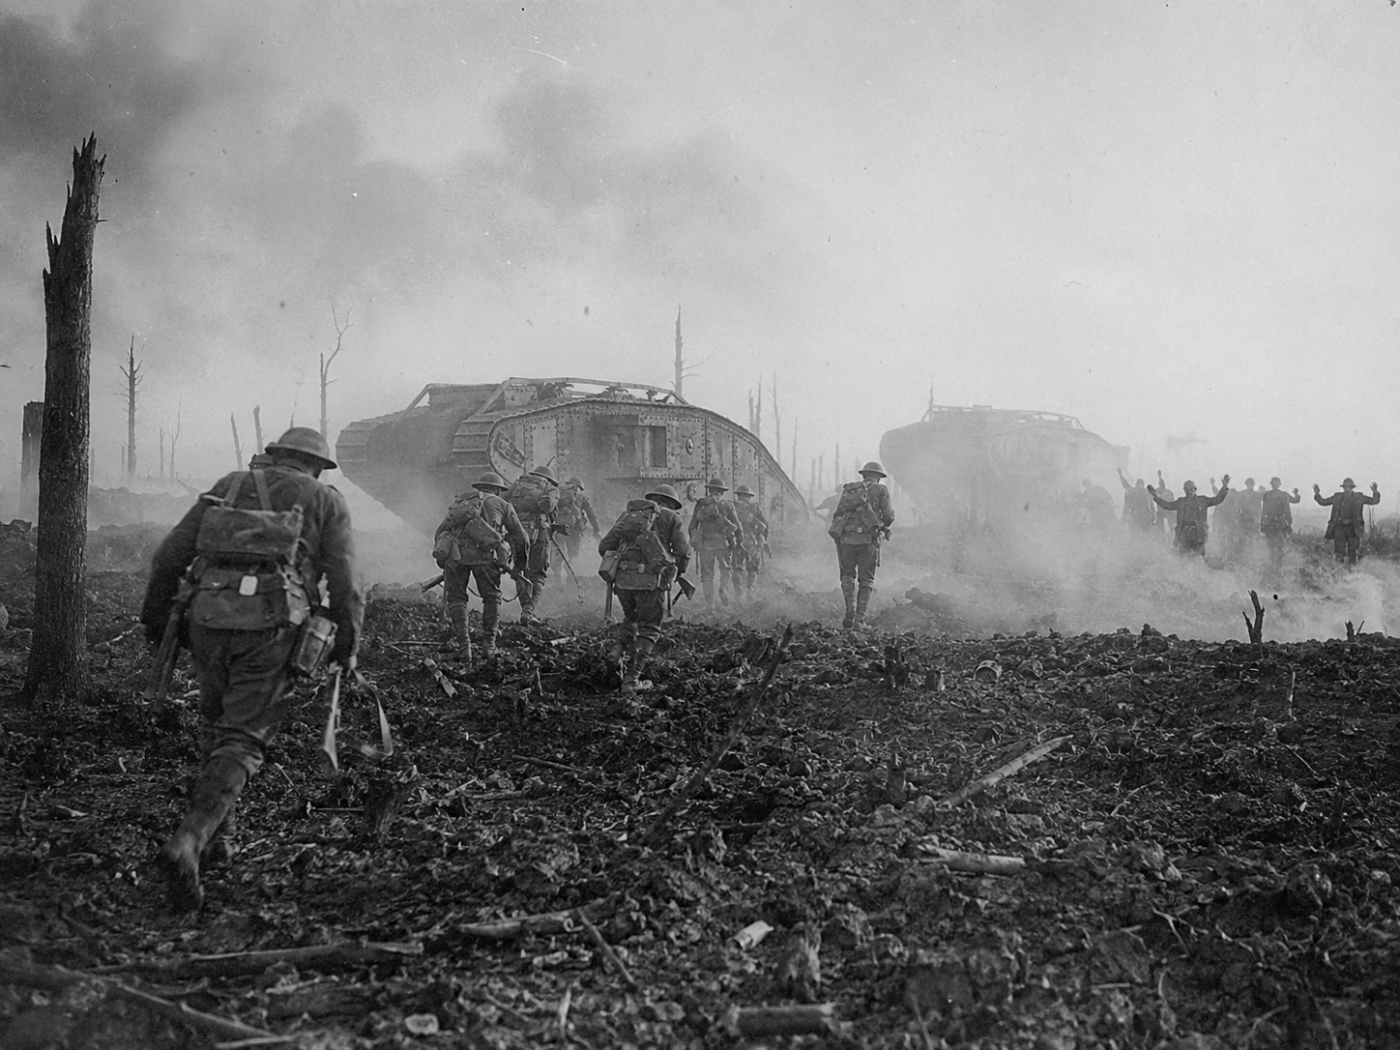
Within only a few hours thousands of German soldiers were walking towards the Allied rear as prisoners. This was the feature of 8 August that disturbed Ludendorff perhaps more than anything else. German soldiers had surrendered before during the war, but the scale of the capitulations at Amiens was different. Entire groups of men sometimes gave themselves up rather than continue fighting. German officers reported troops withdrawing without orders, while formations arriving behind the front encountered streams of exhausted soldiers moving in the opposite direction.
There were even reports of retreating German troops being jeered by other Germans. Ludendorff later referred to incidents in which soldiers moving towards the front were greeted by retreating men with remarks suggesting there was little point continuing the fight. To Germany’s senior commanders this was deeply alarming. An army could replace lost ground and manufacture more weapons, but restoring the morale of soldiers who no longer believed victory was possible was much more difficult.
By the end of 8 August the British Fourth Army alone had captured around 13,000 German prisoners and more than 300 guns, while the French took thousands more. German losses for the day have been estimated at around 30,000 killed, wounded and missing. The Allied armies had advanced as much as seven miles in some areas and had punched a major hole into the German defensive system south of the Somme.
The psychological effect was immense. Ludendorff had experienced catastrophic casualties before. Germany had endured Verdun, the Somme, Passchendaele and years of blockade and attrition. What made Amiens different was that he believed the German Army itself had changed. The ability of some units to resist remained formidable, and many German soldiers continued fighting extremely hard, but Ludendorff saw evidence that the determination holding the army together was weakening.
He later described Amiens as the worst experience he had endured during the war. “The black day” therefore did not simply mean that Germany had lost a battle. Ludendorff was describing what he saw as a crisis of confidence inside the German Army.
The German High Command also had to confront an increasingly hopeless strategic calculation. Germany had gambled heavily on its spring offensives and failed to achieve a decisive victory. Its manpower reserves were diminishing. The naval blockade continued to restrict food and raw materials. Austria-Hungary and Germany's other allies were under increasing pressure, while fresh American troops were arriving in Europe in enormous numbers.
Meanwhile Britain and France could draw upon tanks, aircraft, artillery, ammunition and industrial resources on a scale Germany was increasingly unable to match. At Amiens this imbalance could be seen on the battlefield.
Around 450 British tanks were committed to the operation, including the heavy Mark V and faster Whippet tanks. More than 2,000 artillery pieces supported the offensive and enormous numbers of Allied aircraft operated overhead. Tanks still suffered mechanical failures and many were eventually knocked out or broke down, but during the crucial opening hours they helped overwhelm German strongpoints and created confusion behind the German lines.
The morning mist made their appearance even more frightening. German troops sometimes heard the engines and tracks before they could clearly see the machines approaching. For men who had spent years fighting an enemy largely from prepared trench systems, the battlefield suddenly seemed to be moving around them.
German defensive doctrine had also become increasingly reliant upon depth. Forward positions were not necessarily expected to stop an attack completely; reserves would normally counter-attack and restore the situation. At Amiens the speed of the Allied advance disrupted this system. Communications failed, headquarters were threatened and reserves sometimes arrived to discover that the front they were supposed to reinforce had already disappeared.
German artillery pieces were captured before their crews could withdraw them. Supply dumps, machine guns, ammunition and equipment fell into Allied hands. Roads filled with prisoners while advancing infantry passed abandoned positions that would once have taken days of bitter fighting to capture. For Allied soldiers who had lived through years when advances were often measured in hundreds of yards, the sight was extraordinary.
The significance was immediately recognised at the highest level of the German command. After Amiens, Ludendorff and Field Marshal Paul von Hindenburg met Kaiser Wilhelm II. The German leadership increasingly understood that outright military victory was no longer realistic. The Kaiser is reported to have recognised that the war would have to be brought to an end.
Germany did not collapse immediately. The German Army remained extremely dangerous and would continue fighting for another three months. Some of the hardest battles of 1918 were still ahead, and Allied casualties during the final advance would be severe. What had changed was the direction of the war. The Germans were no longer deciding where the next great offensive would fall. The Allies were.
Amiens became the opening blow of what became known as the Hundred Days Offensive. British, Australian, Canadian, French, American and other Allied forces maintained pressure across the Western Front, deliberately attacking different sectors so that German reserves could not easily be concentrated against a single offensive. The Germans were steadily pushed backwards.
Positions that had been constructed and defended for years were abandoned. The Hindenburg Line, once regarded as one of Germany’s strongest defensive systems, was eventually penetrated. German commanders increasingly found themselves trying to preserve an army rather than attempting to win the war.
That is why 8 August 1918 occupied such a dark place in Ludendorff's memory. It was not Germany's bloodiest day of the First World War, nor did the German Army cease to function. Many German formations at Amiens fought with considerable courage and discipline and Allied commanders themselves understood that resistance remained dangerous.
But something fundamental had changed. For the first time, Germany's senior military leadership had witnessed large numbers of soldiers surrendering while an Allied offensive moved rapidly through positions that should have been defended. The superiority in Allied manpower and equipment was becoming impossible to ignore, and the arrival of increasing numbers of American troops meant the balance could only become worse.
A German victory that had seemed possible during the spring was disappearing. The Battle of Amiens continued until 11 August, but the great breakthrough of the opening day had already delivered its most important result. It had demonstrated that the German Army could be decisively beaten in open battle and that the Allies now possessed the organisation, equipment and confidence to keep attacking.
Ludendorff's famous description of 8 August as the “black day of the German Army” was therefore more than the reaction of a defeated commander. It was an acknowledgement that the character of the war had changed.
Three months and three days later, on 11 November 1918, the guns of the Western Front finally fell silent.