
On this day in military history…
On the evening of 17 August 1943, hundreds of RAF bombers began lifting from airfields across England for one of the most important and carefully planned attacks mounted by Bomber Command during the Second World War. Their destination was a relatively small and little-known site on Germany’s Baltic coast called Peenemünde. Hidden there was one of Nazi Germany’s most closely guarded secrets: the research and development centre responsible for the weapons that would eventually emerge as the V-1 flying bomb and V-2 ballistic missile.
The operation was given the codename Operation Hydra. By the summer of 1943 British intelligence had accumulated increasingly convincing evidence that something highly unusual was taking place at Peenemünde. Reports from European resistance networks, intelligence analysis and RAF photographic reconnaissance helped reveal a sprawling complex containing experimental buildings, workshops, accommodation, an airfield and large structures associated with rocket research. The work of scientific intelligence specialists, particularly R. V. Jones, helped convince the British government that Germany was developing long-range weapons capable of striking Britain.
The importance attached to Peenemünde was extraordinary. RAF crews were deliberately not told the full truth about what was being developed there. Some were informed that they were attacking an important German research establishment connected with developments that threatened Bomber Command. One veteran later remembered being told that if they failed to destroy the target they would return the following night, and continue returning until the job was completed.
The raid was mounted under the overall direction of RAF Bomber Command, commanded by Air Chief Marshal Sir Arthur Harris. A total of 596 heavy bombers were dispatched: 324 Avro Lancasters, 218 Handley Page Halifaxes and 54 Short Stirlings. It was therefore not simply a Lancaster operation but a huge combined effort involving most of Bomber Command's principal heavy-bomber force.
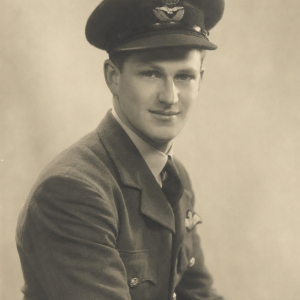
They did not take off from one airfield. Aircraft streamed into the night from numerous Bomber Command stations across eastern and central England belonging to Nos. 1, 3, 4, 5 and 6 Groups together with aircraft of the Pathfinder Force. Among the participating bases were famous bomber stations in Lincolnshire, Yorkshire, Cambridgeshire and elsewhere. Lancaster crews departed from stations including RAF Scampton, while Halifax units operated from Yorkshire bases such as RAF Holme-on-Spalding-Moor and RAF Pocklington. Pathfinder crews flew from their own eastern England stations, including RAF Wyton. One of the young Halifax captains involved, Sergeant George Dunn of No. 76 Squadron, took off from RAF Holme-on-Spalding-Moor in Yorkshire and attacked Peenemünde with the first wave.
A central figure in the operation was Group Captain John Henry Searby of No. 83 Squadron and the Pathfinder Force. Searby was given a remarkable responsibility. Rather than simply marking the target and departing, he was to remain above Peenemünde and control the attack by radio. He effectively became what was known as the Master Bomber, sometimes described at the time as the “Master of Ceremonies”. Although similar ideas had been used on specialised operations, Peenemünde marked the first large-scale Bomber Command raid over Germany in which a Master Bomber exercised this degree of control over the attacking force. Searby remained over the target for roughly half an hour, watching the markers and bombing and transmitting corrections and instructions to the crews approaching beneath him. His leadership during the operation resulted in the immediate award of the Distinguished Service Order.
Accuracy was essential because Peenemünde was quite different from the huge industrial cities normally attacked by Bomber Command. Instead of spreading bombs across miles of an urban area, the RAF had to hit several comparatively small sections of a research establishment. The attack was consequently divided into three phases, with different aiming points. These included the residential area occupied by scientists and technical personnel, the production and workshop area, and the experimental facilities themselves. Pathfinder crews known as “shifters” progressively moved the target marking from one section of the establishment to another so that successive waves attacked different parts of the complex.
The inclusion of the scientists’ accommodation as an aiming point was deliberate. British planners believed that destroying buildings alone would not necessarily stop the programme because machinery could be replaced and workshops rebuilt. The specialist scientists, engineers and technicians represented knowledge that was considerably harder to replace. The intention was therefore not only to wreck the establishment but also to disrupt the specialist workforce responsible for developing the weapons.
Another unusual decision concerned altitude. Bomber Command crews accustomed to attacking German targets at perhaps 18,000 or 20,000 feet were ordered to descend much lower. Many aircraft attacked from between approximately 6,000 and 10,000 feet. Sergeant Dunn later remembered bombing at around 7,000 feet and being able to see the target clearly. The lower altitude greatly improved accuracy but also exposed the bombers to considerably greater danger.
Even more remarkable was the decision to conduct the operation in bright moonlight. Bomber Command normally preferred darkness for protection from German fighters, but Peenemünde was nearly 600 miles from the nearest British airfields and was a difficult precision target. The planners wanted the crews to be able to recognise the Baltic coastline, islands and target area visually. The night of 17–18 August therefore offered the combination of darkness needed for the long journey and moonlight needed for the actual attack.
An elaborate deception operation was organised to give the bombers a chance of reaching Peenemünde before the Luftwaffe understood what was happening. Mosquitoes were sent towards Berlin, creating the impression that Germany’s capital might be Bomber Command’s real objective. German night fighters were initially drawn towards Berlin while the main bomber stream continued towards the Baltic. Fighter Command aircraft also operated against German airfields and other targets in an attempt to interfere with the night-fighter response. The deception worked particularly well during the opening phases of the raid and helped the first bomber waves reach Peenemünde with relatively little fighter opposition.
The route itself was another carefully considered part of the operation. From their widely separated British bases, the bomber formations converged and crossed the North Sea before approaching Germany from the north. Crews faced a round journey of roughly 1,200 miles, actually longer than the normal out-and-back distance for a raid on Berlin. Navigation therefore had to be extremely accurate, particularly because the aircraft would have limited fuel margins after spending time over the distant target.
As midnight passed and 18 August began, the Pathfinders reached Peenemünde. In the clear moonlit conditions the Baltic coastline proved relatively easy to identify. Target indicators began falling and Searby watched their positions from his Lancaster. When markings were inaccurate, corrections were transmitted. When they were correct, incoming crews were told to bomb them.
The first major wave concentrated upon the scientists’ and workers’ residential area. The second shifted towards the factory and workshops, while the later aircraft attacked the experimental section. No. 5 Group crews in the final phase had practised an unusual time-and-distance bombing method, using a known visual reference and carefully calculated flying time to place their bombs on the required area.
From approximately 02:00 the concentration of bombing became increasingly intense. Searby reported heavy bombing, spreading fires and increasingly severe destruction. By the later stages of the attack, smoke and flames had become so extensive that individual buildings could no longer easily be distinguished from the air.
Around 560 of the dispatched bombers are generally recorded as having attacked, dropping roughly 1,800 tons of bombs. Approximately 85 per cent of the tonnage consisted of high explosive, with incendiaries making up much of the remainder. The resulting destruction struck housing, workshops and parts of the experimental establishment.
The operation, however, became increasingly dangerous as German controllers realised that Berlin was not the main target. Luftwaffe night fighters were redirected towards Peenemünde and began reaching the bomber stream during the later stages of the attack and on the return journey.
The bright moonlight that had helped RAF bomb aimers also made the four-engined bombers easier for German fighter crews to find. Nos. 5 and 6 Groups, arriving in the later phases, suffered particularly heavily. Standard Bomber Command records give losses of 40 heavy bombers: 23 Lancasters, 15 Halifaxes and two Stirlings, around 6.7 per cent of the force dispatched. Contemporary reports initially announced 41 bombers missing, which accounts for the slightly different totals sometimes encountered in accounts of the raid.
Hundreds of RAF airmen consequently failed to return to their bases that morning. Many were killed, while others survived crashes or parachute descents only to become prisoners of war. The raid demonstrated once again how dangerous deep-penetration night operations remained even when careful deception and electronic countermeasures were used.
Peenemünde was also important in the continuing battle between bombers and night fighters. German fighter tactics were becoming increasingly flexible following the RAF’s introduction of Window, strips of aluminium foil dropped to confuse German radar. During the Peenemünde operation German night fighters were increasingly being concentrated against the bomber stream rather than rigidly controlled within individual defensive boxes, a development that would become known as Zahme Sau, or “Tame Boar”.
On the ground the destruction was substantial but not absolute. Some experimental and scientific facilities survived, while other sections were badly damaged. Important personnel were killed, including rocket-engine specialist Dr Walter Thiel, although later assessments have shown that early RAF estimates of the number of important scientists killed were probably too high.
There was also a grim human cost among people who had no involvement in the German rocket programme. Foreign forced labourers and prisoners were housed close to the establishment, and bombing caused casualties among these workers as well as German civilians and technical personnel. The V-weapons programme itself would subsequently become deeply dependent upon slave labour when production of the V-2 was transferred underground.
The Germans reacted quickly to the raid. The vulnerability of Peenemünde was now obvious, and major elements of the missile programme were dispersed. V-2 production was transferred to the vast underground Mittelwerk complex near Nordhausen, where prisoners from the Mittelbau-Dora concentration camp were subjected to appalling conditions while manufacturing rockets. The move protected production from conventional bombing but resulted in thousands of prisoner deaths.
Exactly how much Operation Hydra delayed the V-weapons programme remains debated. Bomber Command initially believed that the raid had delayed it by perhaps four to six months, and some wartime accounts suggested around six months. Later German evidence indicated that the direct delay to research may have been considerably shorter, perhaps several weeks, although the disruption, dispersal of work, destruction of facilities and forced relocation of production had much wider consequences. The RAF’s own later historical analysis notes the disagreement between British estimates and German assessments.
What cannot be disputed is the importance Britain attached to the threat. The V-1 would begin falling on Britain in June 1944, followed by the V-2 in September. The V-2 became the world’s first operational long-range guided ballistic missile. Travelling several times the speed of sound during its descent, it arrived without warning and could not be intercepted by the fighters or anti-aircraft guns of the period.
Peenemünde therefore represented something quite different from a conventional factory target. The RAF had attempted to destroy a weapon before it could become fully operational.
Operation Hydra also demonstrated how sophisticated Bomber Command operations had become by the summer of 1943. Reconnaissance, intelligence, deception, Pathfinder marking, radio control, precisely timed bomber waves, specialist bombing techniques and fighter operations were combined into a single coordinated attack hundreds of miles inside enemy territory.
At the centre of it all was Group Captain John Searby circling above a burning Peenemünde, directing hundreds of bombers by radio while German fighters gathered around the target. His role established the Master Bomber technique as an increasingly important method for later precision attacks.
As dawn returned on 18 August, surviving Lancasters, Halifaxes and Stirlings began appearing over their home airfields after the long flight from the Baltic. Many stations were waiting for aircraft that would never return.
Despite the heavy losses, Operation Hydra was judged a success. Peenemünde had been badly damaged, important specialists had been killed, production and research had been disrupted and the Germans had been forced to disperse one of their most secret weapons programmes.
The raid of 17–18 August 1943 was therefore far more than another Bomber Command operation. It was a direct British attempt to prevent Nazi Germany from introducing an entirely new generation of long-range weapons, and it became one of the most technically ambitious and historically significant RAF night raids of the Second World War.